As an Amazon Associate I earn from qualifying purchases and sometimes recommend products from other sellers at no extra cost to you. For more details see my disclosure policy and privacy policy.
This post may contain affiliate links - I may make commission from any purchases.
September has a way of sneaking up on crafters. One week you’re finishing off summer projects, and the next you’re digging through bins trying to find last year’s felt stash while October’s project ideas are already piling up in your head. Getting your space sorted now, before the rush actually hits, makes the whole season easier to enjoy instead of just endure.
This isn’t about a full room renovation or an aesthetic overhaul. It’s a practical prep pass, the kind you can knock out over a weekend, so that by the time you’re ready to actually start making things, your space is working with you instead of against you.
Table of Contents
Audit What You Actually Have
Before you buy a single new bin, pull everything out and separate your everyday crafting stock from anything that’s genuinely Halloween-specific. Felt, foam sheets, black and orange cardstock, novelty buttons, spooky-themed embellishments, and any half-finished props from last year all belong in one pile.
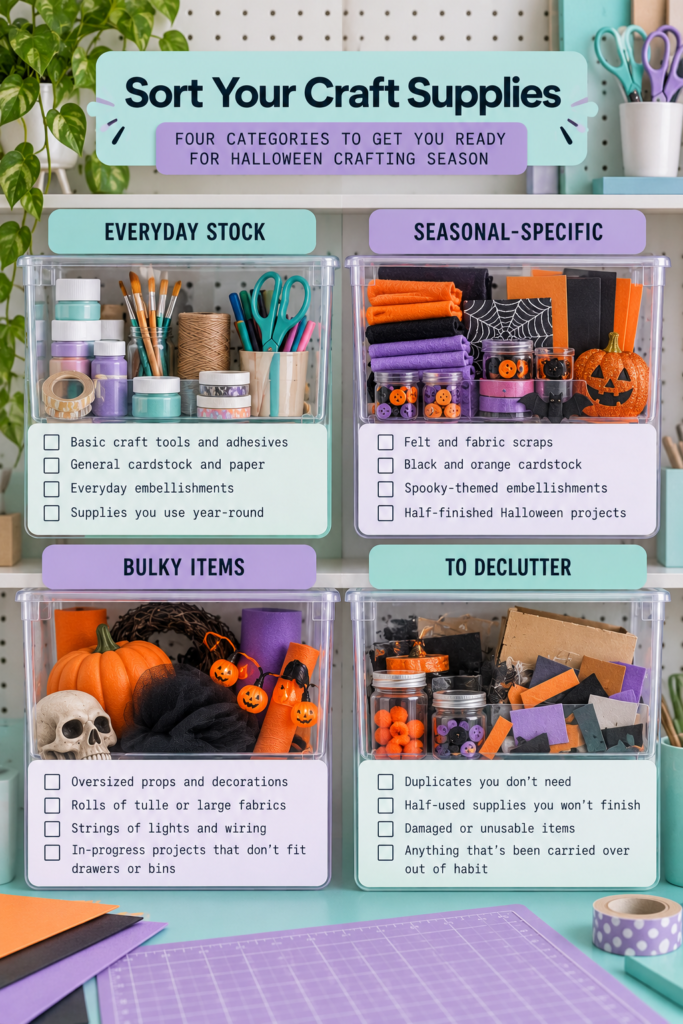
This is also the point where you’ll spot duplicates you’d forgotten about. It’s common to find three half-used bags of the same orange pom-poms because last September’s version of you couldn’t find the first one either. Consolidate as you go, and be honest about what you’ll realistically use this season versus what’s been carried over out of habit.
While you’re at it, this is a good moment to check in on the rest of your everyday stock too, not just the Halloween-specific pile. If your stash includes ongoing fibre craft projects, our guides to knitting supply storage and how to store embroidery supplies go into much more depth on organising yarn, thread, needles, and hoops specifically, worth a look if those categories tend to sprawl for you the way seasonal supplies do for others.
Set Up a Dedicated Seasonal Zone
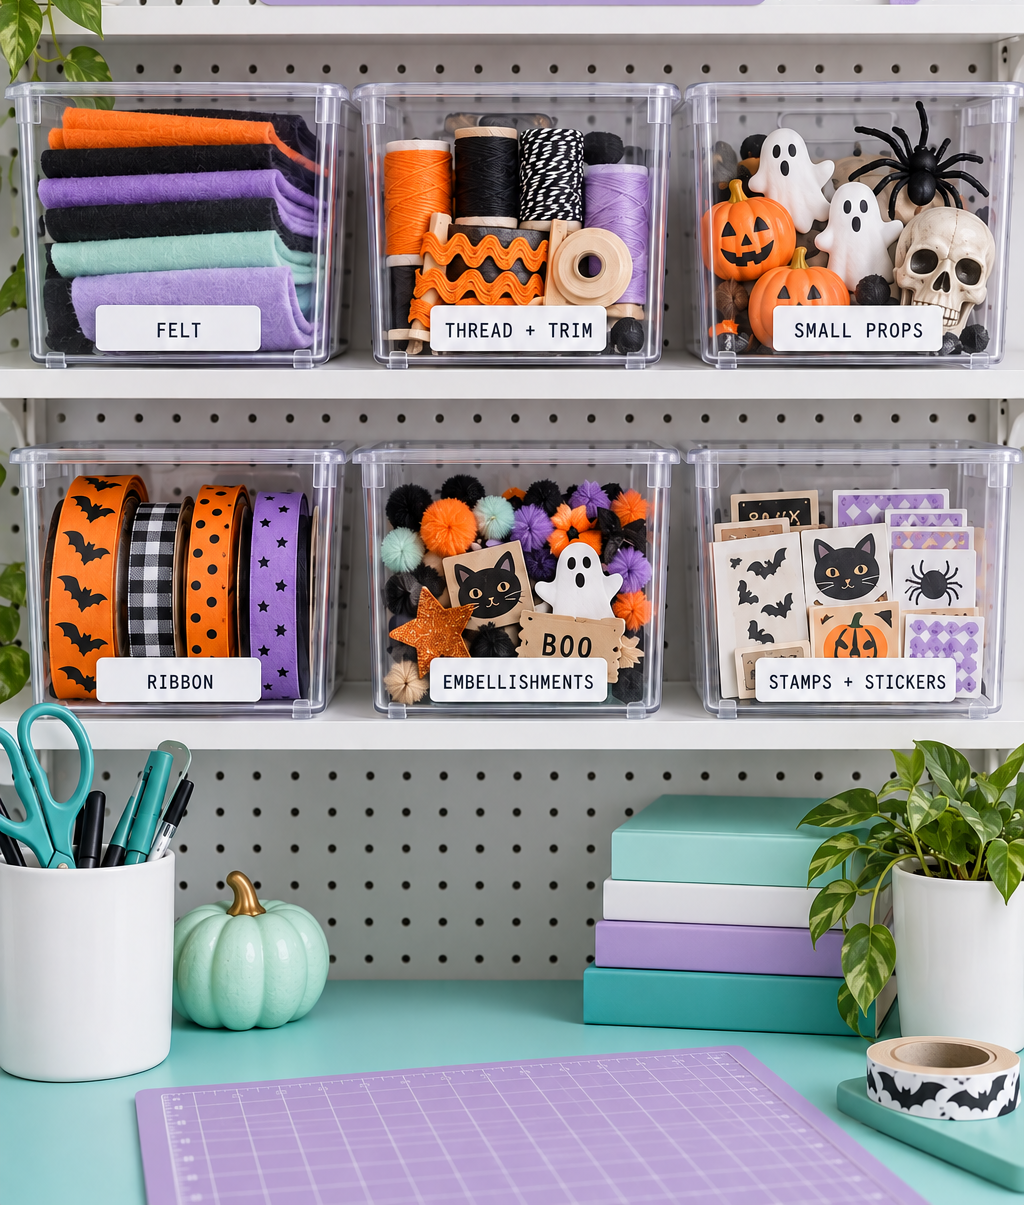
Once you know what you’re working with, give it a proper home rather than tucking it wherever there’s space. A labelled bin system works well here: one clear bin per category (felt and fabric scraps, paint and embellishments, finished or half-finished props) beats a single catch-all box you’ll be rummaging through in three weeks.
Clear bins are worth the small extra cost over solid ones, since being able to see the contents at a glance saves real time once you’re mid-project and need a specific colour of foam sheet in a hurry. Label each one clearly, whether that’s a label maker, hand-lettered tags, or simply a marker and masking tape. The method matters less than actually doing it consistently.
If your current setup already leans toward general, year-round organisation rather than a seasonal system, our guide on keeping your craft room functional covers the maintenance side of things in more depth, worth a look if your whole space needs a refresh rather than just a seasonal pocket of it.
Handle the Bulky, Awkward Stuff Separately
Seasonal crafting tends to produce the supplies that don’t fit neatly into a drawer: rolls of black tulle, oversized foam pumpkins, strings of lights, or a half-built prop that’s too big to put away until it’s finished. Trying to force these into your existing storage usually just means they end up living on the floor for a month.
A rolling craft storage cart is genuinely useful here, since it gives bulky or in-progress items a defined spot that can move out of the way when you’re not actively working, rather than permanently colonising your work surface. If you’re working in a smaller footprint generally, our small craft space ideas guide has more on making awkward-shaped storage work in closets, corners, and shared rooms.
Quick Wins If You’re Short on Time
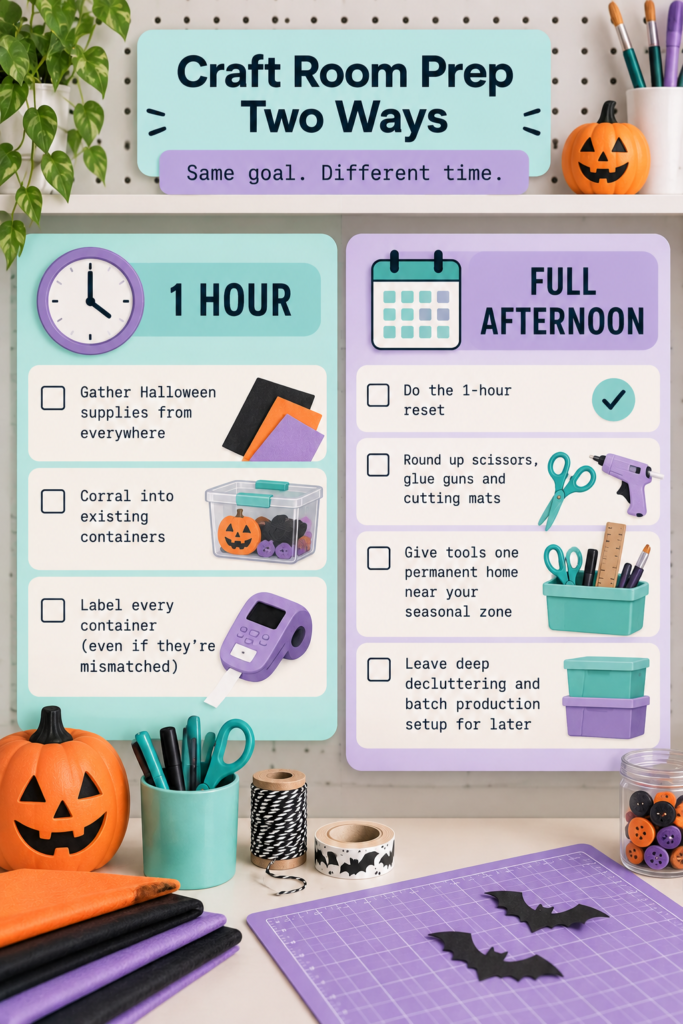
Not everyone has a free weekend to dedicate to this before October arrives, and a partial pass is still worth doing. If you’ve only got an hour, focus on these three things in order: pull the Halloween-specific supplies out from everywhere they’re currently scattered, corral them into whatever containers you already own, and label those containers even if they’re mismatched. A messy-but-labelled system beats a tidy one you never got around to finishing.
If you’ve got a full afternoon instead, add a pass through your tools next. Scissors, hot glue guns, and cutting mats tend to migrate around a house during a busy crafting season, so rounding them up and giving them one home near your seasonal zone saves a surprising amount of hunting later. Save the deep declutter and the batch-production setup for whenever you next have a proper block of time, since neither is urgent enough to hold up getting started.
Set Up Your Workspace for Batch Production
If you’re making multiples, whether that’s for gifting, selling, or just because one spooky wreath was never going to be enough, it’s worth setting up your workspace differently than you would for a single one-off project.
Group your most-used tools and materials within arm’s reach of your main work surface, and keep a separate staging area for finished or drying pieces so they’re not competing for space with what you’re currently working on. A few practical habits that pay off during a batch run: pre-cutting repeated shapes in one sitting rather than one at a time, keeping a small tray for each project’s set of pieces so nothing gets mixed up, and doing one process across every item before moving to the next step (all your gluing, then all your painting) rather than finishing pieces one by one.
This kind of assembly-line approach also makes it much easier to spot how much of each material you’ve actually got left partway through a run, rather than discovering you’re two pom-poms short with half the batch still unglued. If you’re making items to sell, a simple tally sheet taped to the edge of your workspace, tracking how many of each piece you’ve completed, saves you from either overproducing or running short before a deadline.
Think about drying and curing space too, since this is the part of batch work that most craft rooms aren’t originally set up for. A dedicated shelf, a spare table, or even a labelled section of floor space that’s off-limits to foot traffic while things dry keeps finished pieces from getting knocked, smudged, or accidentally packed away before they’re ready.
Do a Quick Pre-Season Declutter
Before new supplies come in, spend twenty minutes doing a pass through your existing stash. Toss anything dried out, cracked, or otherwise unusable, and be realistic about craft ideas from last year that never quite happened and probably won’t this year either.
This doesn’t need to be a full deep clean. The goal is just to free up enough space that new seasonal supplies have somewhere to actually go, rather than getting stacked on top of everything else.
A useful test for anything you’re unsure about: if you didn’t reach for it at all last October, ask honestly whether this is really the year that changes. Dried-out paint pens, half a bag of glitter that’s mostly gone to clumps, or a prop you started three years ago and never finished are all fair game for letting go of. It’s easier to be objective about this now, before the season’s momentum makes everything feel like it might be useful “just in case.”
Protect Your Setup for Next Year
Once the season winds down, how you pack things away directly affects how easy this whole process is next September. Store your labelled seasonal bins together in one spot, whether that’s a shelf, a closet corner, or under a bed, rather than scattering pieces back into general storage where they’ll be forgotten by next year.
Quickly note what you ran out of or wished you’d had more of while it’s fresh in your mind, even a scribbled line on a sticky note inside the bin lid. Future you, standing in this exact spot next September, will be glad of the reminder.
Getting your space sorted this early doesn’t just make the crafting easier, it means you actually get to enjoy the season instead of spending the first two weeks of it hunting for a glue gun.
A Few Quick Questions
Do I need to buy all-new bins to make this work? Not at all. Mismatched containers you already own are perfectly fine as a starting point, consistent labelling matters far more than matching containers. Upgrade to a uniform set later if it bothers you, but don’t let that hold up getting organised now.
How much time should I realistically set aside? A full pass through everything in this post, audit, bins, bulky-item storage, and a quick declutter, tends to take a weekend for an average-sized stash. If that’s not available to you, the quick-wins section above covers what to prioritise with just an hour or an afternoon instead.
What if my craft room is shared with another purpose, like a guest room or home office? Everything here still applies, it just means leaning more heavily on bins and a rolling cart that can tuck away completely when the space needs to serve its other function, rather than assuming you’ll always have dedicated surfaces free.