As an Amazon Associate I earn from qualifying purchases and sometimes recommend products from other sellers at no extra cost to you. For more details see my disclosure policy and privacy policy.
This post may contain affiliate links - I may make commission from any purchases.
If your embroidery stash lives in a tangle of plastic bags, half-used skeins, and needles you can never find when you need them, you are not alone. Most storage advice for embroidery supplies stops at “get a caddy,” but that only solves half the problem. The real trick is building a system that matches how you actually work, not just a container to dump things into.
This guide walks through a workflow-based approach to storing embroidery supplies: one system for the project you’re actively stitching, and a separate one for the stash you’re saving for later. Whether you have a dedicated craft room or a corner of the dining table, you’ll find a version of this that fits your space.
Table of Contents
Why Sorting by Workflow Beats Sorting by “Stuff”
Most embroidery storage guides organize by category: threads here, needles there, hoops on a hook. That’s a fine starting point, but it misses the bigger issue, which is that your active project and your long-term stash have completely different storage needs.
Your active project needs to be grab-and-go. You want your current thread colors, needles, and hoop within arm’s reach, in something you can pick up and move to the sofa without spilling. Your stash, on the other hand, needs to stay protected, sorted, and out of the way until you’re ready to dig into it. Trying to store both the same way is usually what causes the clutter in the first place.
The Two-Zone Approach
Think of your supplies in two zones. Zone one is “in progress,” a small, portable kit that holds only what the current project needs. Zone two is “archive,” where everything else lives in a more permanent, space-efficient setup. Once a project wraps up, its leftover thread and materials move from zone one back into zone two, and the cycle starts again.
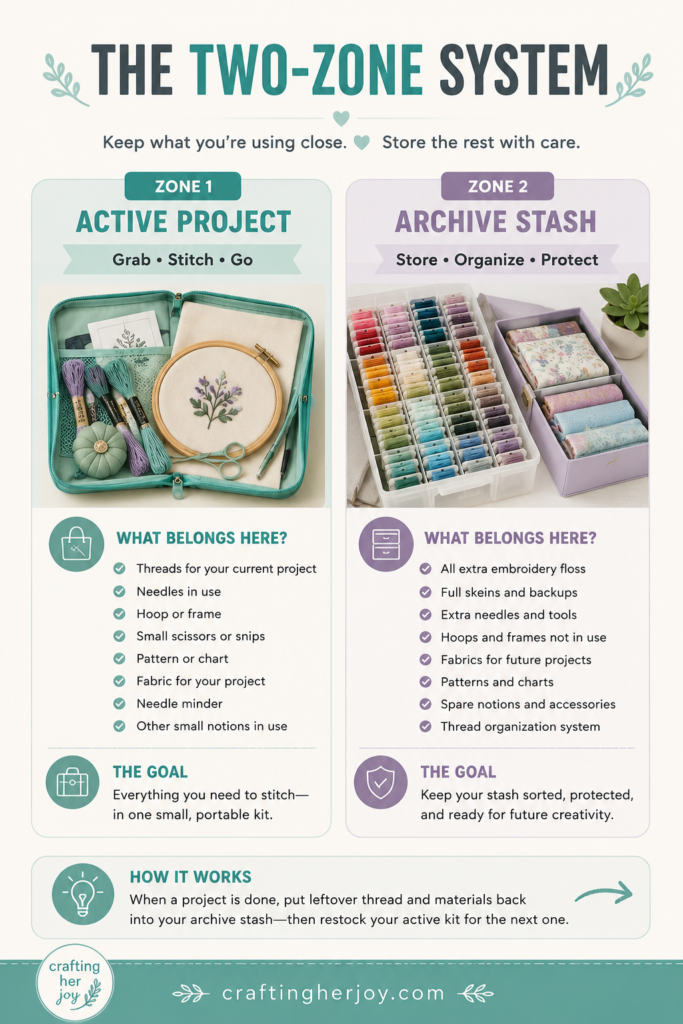
This two-zone habit alone solves most of the “where did I put that” frustration, because you’re never hunting through your entire stash to finish a project that’s already 80 percent done.
Sorting Principles: Color, Project, or Thread Type
Before you buy or build anything, decide how you want to sort your stash, because this decision shapes every storage choice after it.
Sorting by Color
Sorting by color makes the most sense if you tend to design your own pieces or improvise as you go, since you’ll often reach for “a green” rather than a specific brand and number. The downside is that it takes longer to find an exact shade match when a pattern calls for one.
Sorting by Thread Type or Brand
If you work mostly from patterns that specify exact floss numbers, sorting numerically by brand and number is usually faster in practice, even though it looks less colorful on a shelf. This method shines for cross stitch and pattern-driven embroidery, where matching a chart number quickly matters more than browsing by eye.
Sorting by Project
A project-based system groups thread, fabric, and notes for a single piece together, which works well if you tend to have a few pieces going at once rather than a huge shared stash. It’s less efficient for solo stitchers with one big collection, since you’ll end up duplicating popular colors across multiple project bags.
There’s no single right answer here. Many stitchers land on a hybrid: stash sorted by color or number for the archive, with a project-based grab bag for whatever is currently in the hoop.
Active-Project Storage vs. Long-Term Stash Storage
Once you’ve picked a sorting method, the next decision is where things physically live.
Setting Up Your Active-Project Kit
Your in-progress kit should be small enough to carry and simple enough to pack up in under a minute. A shallow tray, a zippered pouch, or a small tackle-style box works well here, since the goal is portability rather than capacity. Keep only the thread colors, needles, and hoop for your current piece inside it, along with a small pair of scissors and your pattern or chart.
Building Your Long-Term Stash System
Your archive storage can be less portable and more protective, since it’s not moving around daily. Clear photo boxes with dividers, stackable drawer units, or labelled bins all work, and the “right” choice usually comes down to how much floss you actually own rather than what looks best. A modest stash of a few hundred skeins fits comfortably in a couple of divided boxes, while a larger collection benefits from a drawer system you can sort visually at a glance.
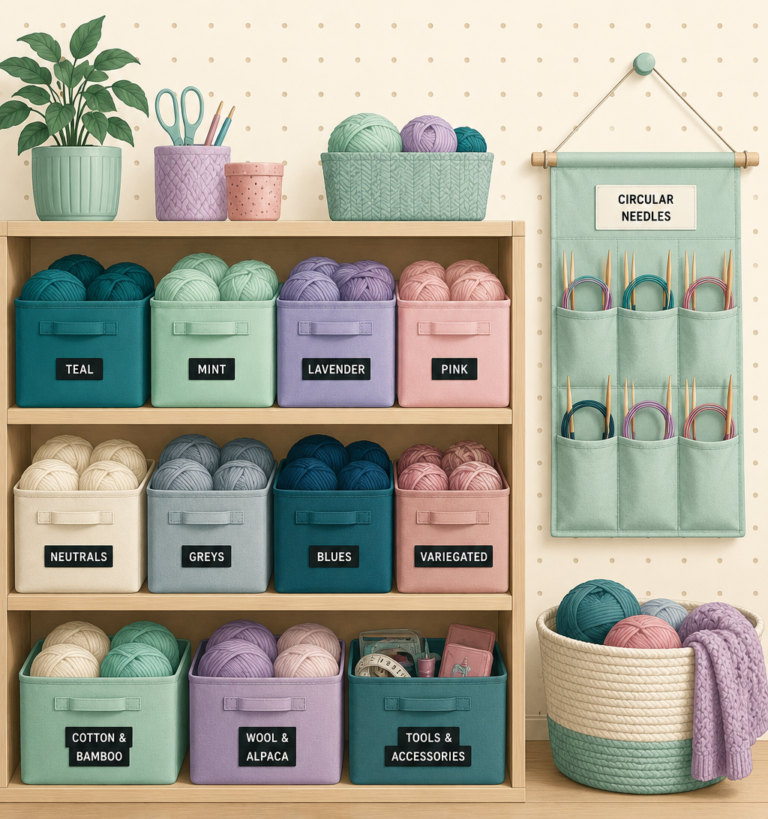
If you’re also managing a broader craft stash beyond embroidery, it’s worth applying the same active versus archive thinking across the board. Our guide to organising knitting supplies walks through a similar workflow-based system that pairs well with this one if you split your time between crafts.
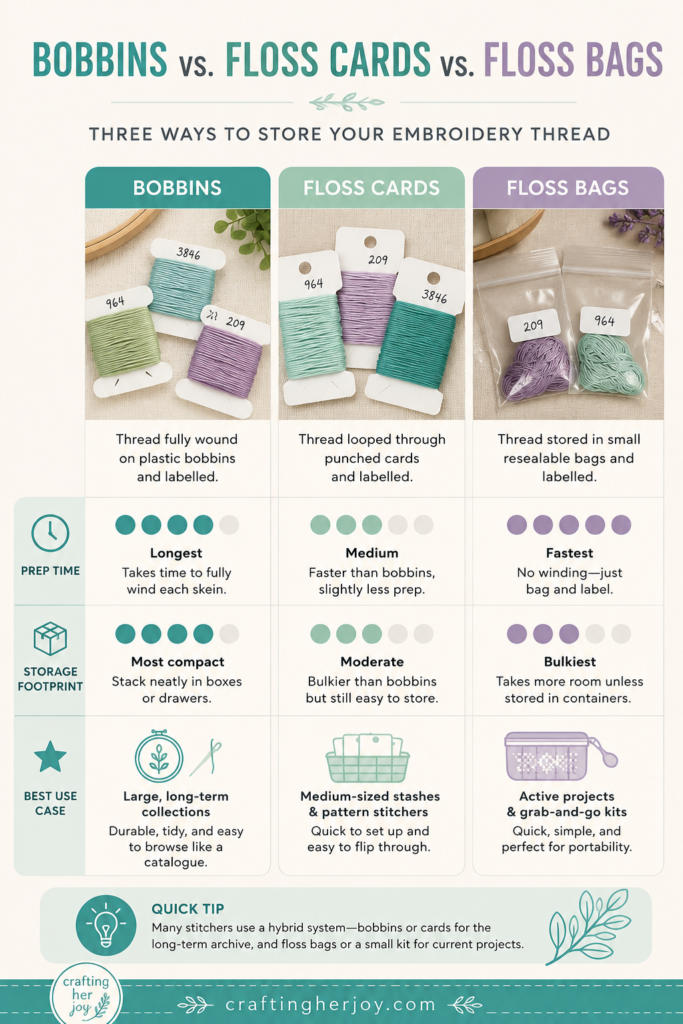
Thread Organization: Bobbins, Cards, and Floss Bags
Thread storage is where most stitchers get stuck, mostly because there are three common methods and no universal winner.
Plastic or Cardboard Bobbins
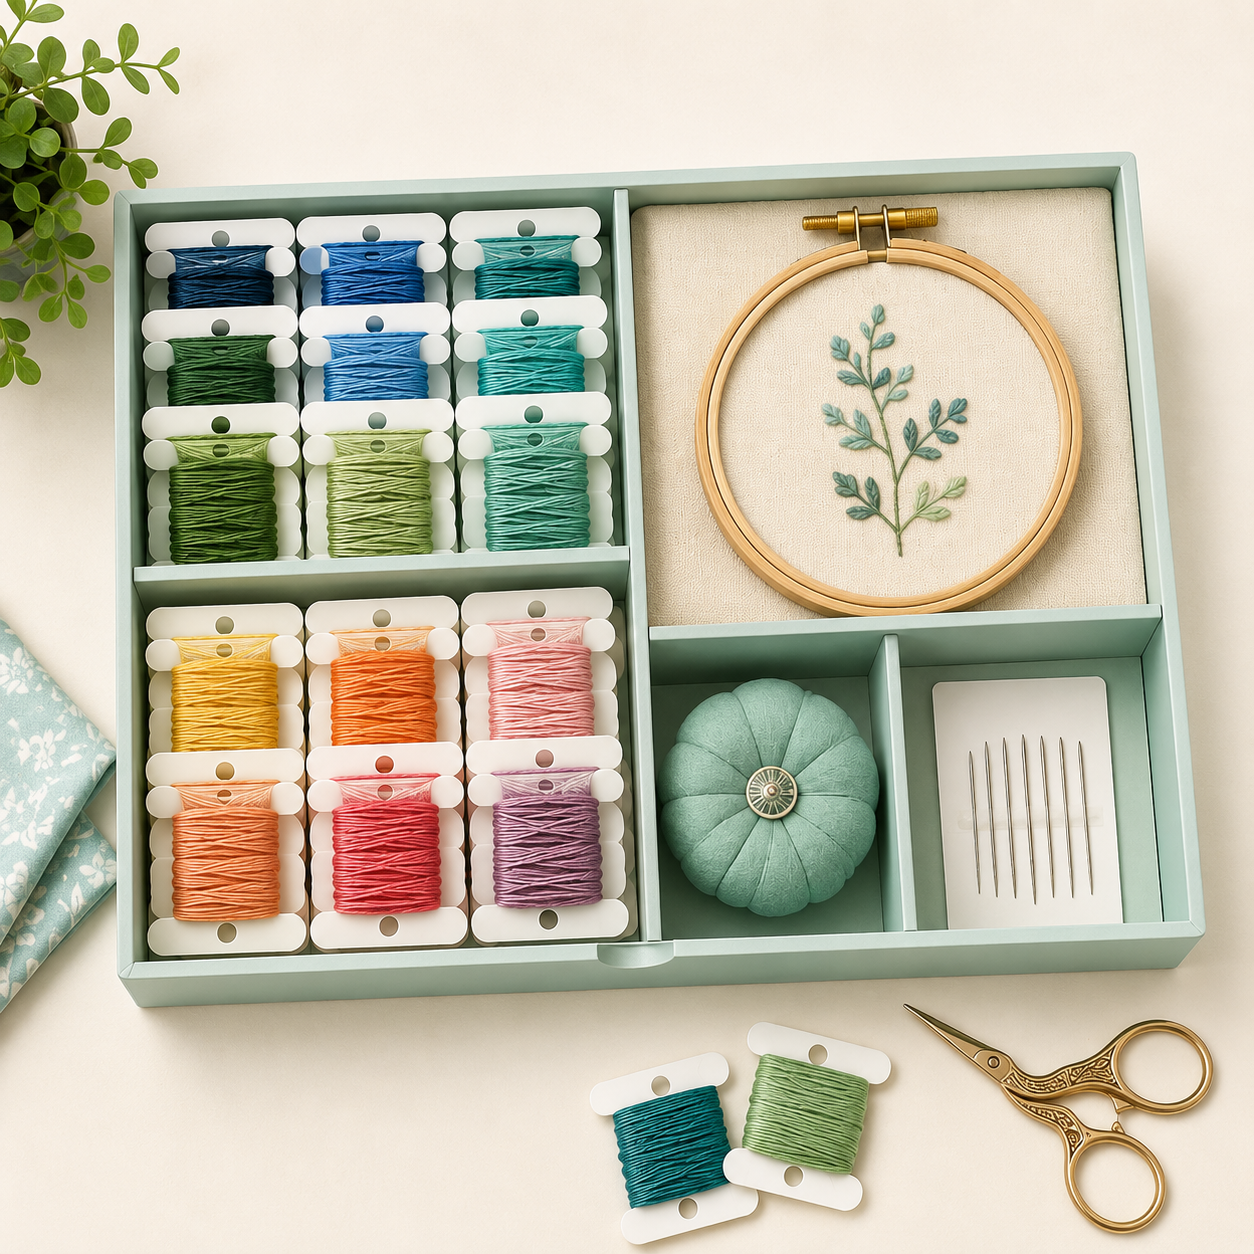
Bobbins keep each skein wound flat and labelled, which makes them easy to flip through like a card catalogue. They take a bit of upfront winding time, but they’re durable, stack well in a divided box, and hold up to years of handling without fraying.
Floss Cards
Floss cards are a faster middle ground, since you loop the thread through a punched card rather than fully winding it. They take less time to set up than bobbins but are slightly bulkier to store, which matters if you’re working with a large collection in a small space.
Small Floss Bags
Individual floss bags, whether resealable plastic or fabric, are the fastest option and add almost no prep time, but they don’t stay as visually organized on their own. They work best when paired with a labelled outer container, since the bags themselves offer no sorting structure.
If you’re just getting your stash under control for the first time, a set of floss bobbins with a color-coded storage box is usually the easiest entry point, since it combines protection with a built-in sorting system in one purchase.
Needle, Hoop, and Small-Tool Storage
Needles, hoops, and small tools tend to be the things that vanish, mostly because they don’t have an obvious “home” the way thread does.
Keeping Needles Findable
A small pincushion or a magnetic needle case works well for your active kit, while a labelled needle book or case with individual sleeves is better for your archive, since it keeps different needle sizes from mixing together. Magnetic organizers in particular are handy for keeping loose needles from disappearing into the bottom of a bag.
Storing Hoops Without Cracking Them
Hoops store best either flat in a drawer or hung on a wall pegboard, since stacking them loosely tends to warp wooden hoops over time. If wall space is limited, a shallow under-shelf basket keeps hoops accessible without taking up drawer real estate.
Small Tools That Get Lost
Scissors, thread cutters, and thimbles do best in a small dedicated pouch or a divided tray insert rather than loose in a drawer. A compact organizer with individual slots, similar to a jewelry tray, keeps these tools visible and prevents the scissors-hunting scramble mid-project.
Space-Saving Solutions for Smaller Craft Rooms
Not everyone has a dedicated craft room, and that’s fine. This system scales down just as well as it scales up.
Working from a Shared Space
If you’re stitching from a shared table or a corner of another room, prioritize stackable, lidded containers you can move in one trip rather than open bins that spill. A rolling cart with a few drawers works especially well here, since it tucks against a wall when you’re not using it and rolls out fully stocked when you are.
Vertical Storage for Small Rooms
When floor and surface space are tight, look up. A wall-mounted pegboard or a slim over-door organizer can hold hoops, small tools, and even bobbin trays without using any tabletop space at all.
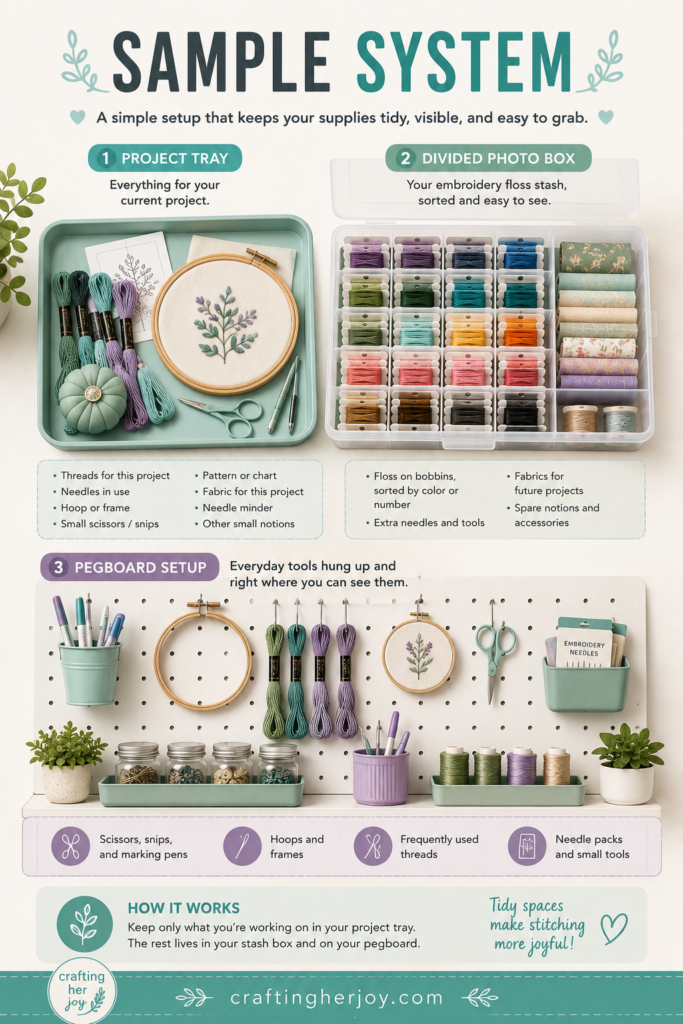
Putting It All Together: A Sample System
Here’s what a complete, budget-conscious system looks like in practice. A shallow project tray holds the current piece’s thread, needle, hoop, and pattern for grab-and-go stitching. A divided photo box, sorted by thread number, houses the long-term stash in labelled bobbins.
A small magnetic needle case sits inside the project tray, while a wall-mounted pegboard nearby holds spare hoops and a pair of embroidery scissors. Nothing here requires a dedicated room, and the whole setup can live on a single shelf or in a closet when not in use.
If you’re newer to the craft and still building out your kit, our rundown of essential embroidery tools and materials is a good companion piece for figuring out what’s actually worth owning before you start organizing it.
Final Thoughts
Storage only works when it matches how you actually stitch, not how a container looks on a shelf. Start with the two-zone approach, pick a sorting method that fits your patterns and habits, and build outward from there. You don’t need a full craft room or a cart full of specialty bins to get organized. You just need a system that gets your current project into your hands quickly and keeps the rest of your stash from becoming a mystery pile.
What’s your current embroidery storage struggle? We’d love to hear what’s working (or not working) for your stash.