As an Amazon Associate I earn from qualifying purchases and sometimes recommend products from other sellers at no extra cost to you. For more details see my disclosure policy and privacy policy.
This post may contain affiliate links - I may make commission from any purchases.
Search “yarn storage ideas” and you’ll get the same roundup on repeat: ten cute baskets, a wall of Instagram-worthy shelving, and not a single question about how much yarn you actually own or how much space you actually have.
A single knitter with a shoebox of leftover sock yarn and a serious collector with three overflowing wardrobes need completely different systems, but most content treats them exactly the same. This guide doesn’t. It’s organised by how much you’ve got and how much room you’re working with, so you can land on a system that fits your actual stash instead of someone else’s pretty photos.
Table of Contents
Why Generic Storage Roundups Don’t Work for Knitters
Yarn storage isn’t really about baskets. It’s about volume, fibre care, and access, three things a generic “cute storage ideas” list rarely accounts for. Wool needs breathing room and protection from moths and damp. A working project needs to be grabbed and put away dozens of times before it’s finished. A stash that’s grown over several years needs a system that scales, not a one-off container that gets full within a month.
That’s why the starting point for good yarn storage isn’t choosing a container. It’s understanding what you’re actually storing and how you use it.
Start With a Sort, Not a Shelf
Before buying anything, sort what you already have into three rough categories. First, yarn by weight: fingering, DK, worsted, chunky, and so on, since storing by weight makes it far easier to find what a pattern calls for later. Second, yarn by project-use: is it earmarked for something specific, or is it stash yarn without a plan yet? Third, anything that falls into UFO territory, meaning unfinished objects, the half-finished projects sitting in bags around the house that need their own separate system entirely.
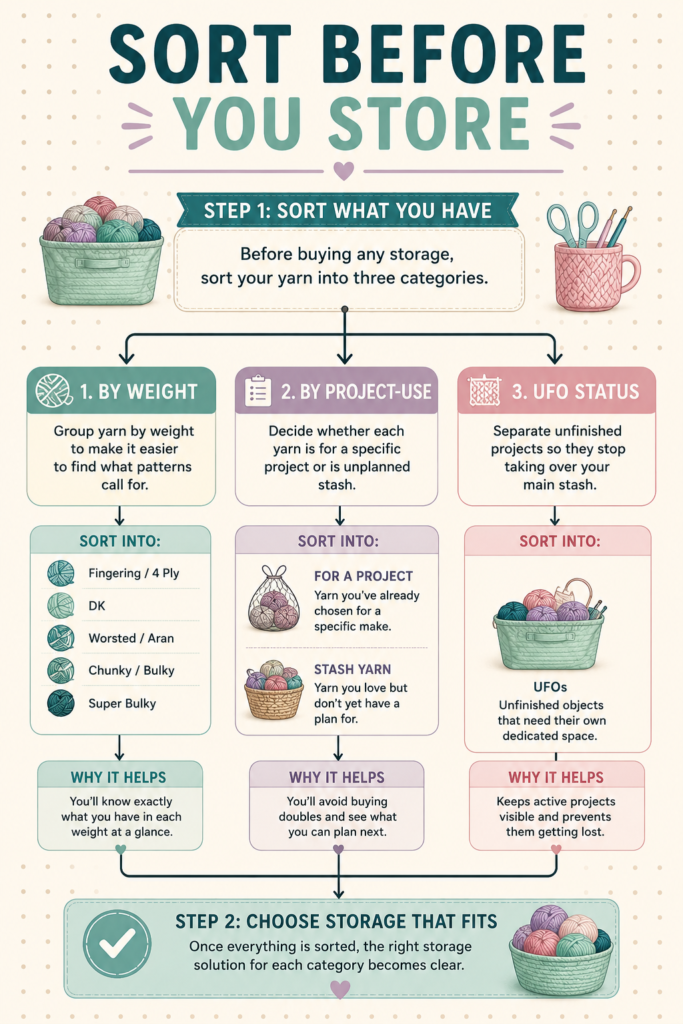
This sort takes an afternoon, but it does more for your storage than any container you could buy. Once you can see your yarn in these three groups, the right storage solution for each group becomes much more obvious, and you’ll often find you need less new storage than you assumed once duplicates and forgotten scraps are out of the way.
Storage by Stash Size: Starter, Growing, and Serious Collections
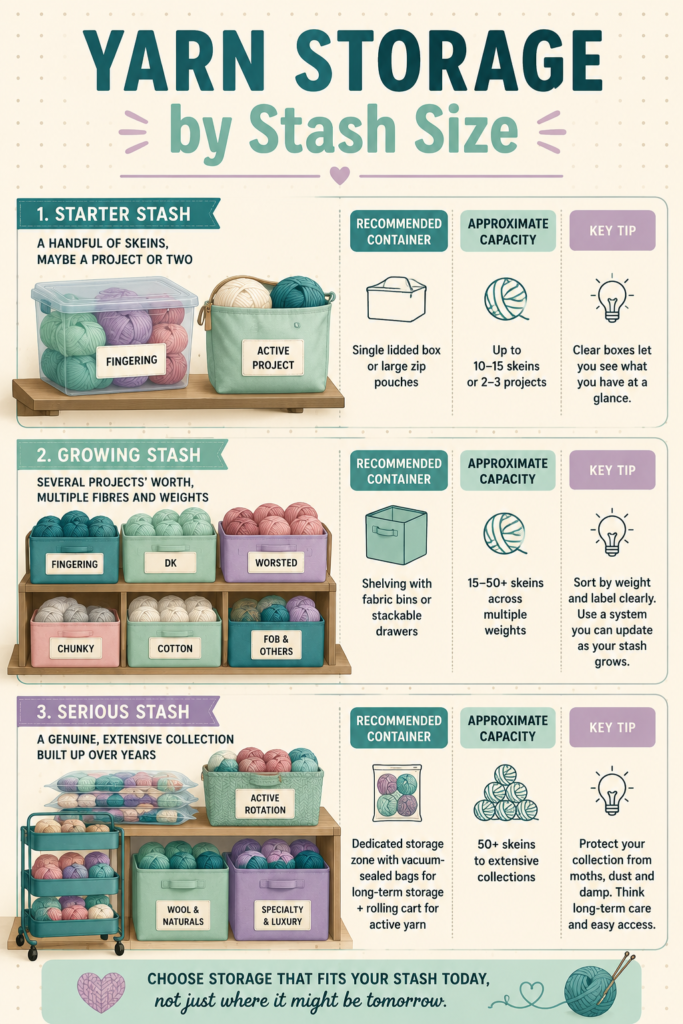
Stash size changes everything about which storage actually works, so treat these as three different starting points rather than a single hierarchy you’re meant to climb.
Starter stash (a handful of skeins, maybe a project or two): a single lidded box or a couple of large zip pouches is genuinely enough. Clear boxes are worth the small extra cost here because you can see contents at a glance without opening several containers to find one skein. There’s no need to invest in furniture-level storage at this stage, and doing so early often means buying twice once your stash grows.
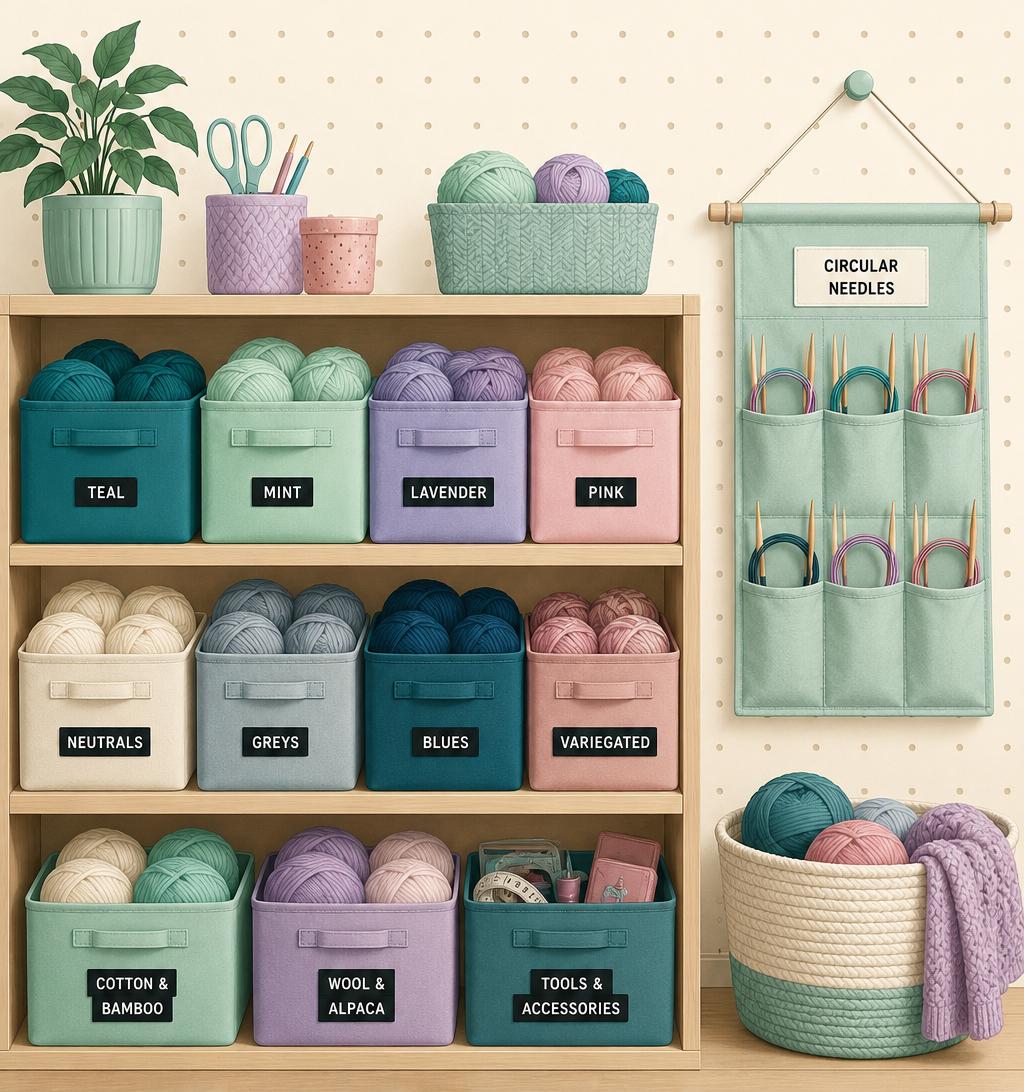
Growing stash (several projects’ worth, multiple fibres and weights): this is where dedicated shelving or a stackable bin system starts to earn its keep. Sort by weight into individual bins or drawers, and label each one clearly, ideally with a system you can update as things shift, since a growing stash rarely stays static for long. A repurposed bookshelf with fabric bins works just as well as anything sold specifically for craft storage.
Serious stash (a genuine, extensive collection built up over years): at this scale, think in terms of a dedicated storage zone rather than a single unit. Vacuum-sealed bags protect less frequently used yarn from moths and dust while dramatically reducing the space it takes up. A rolling cart or trolley works well for yarn in active rotation, since it can move between your storage zone and wherever you actually sit to knit. Whatever the setup, the goal at this scale is protecting the collection long-term, not just fitting it somewhere.
Needles and Notions: The Small Stuff That Gets Lost
Needles and notions cause more daily frustration than yarn ever does, mostly because they’re small, numerous, and easy to lose track of.
Circular needles do best in a hanging organiser with individual pockets or loops, sorted by size, since tangled circulars are one of the most common knitting frustrations there is. Double-pointed needles (DPNs) need something narrow and upright, like a jar, a pencil case, or a dedicated tube-style case, grouped by size so a full set stays together. Small notions, stitch markers, tapestry needles, gauge tools, and so on, are best kept in a single compartmentalised case rather than scattered across several containers, because the whole point of good notion storage is being able to find the one thing you need in seconds, not minutes.
If you only fix one part of your current system, this is often the one worth starting with. Yarn sitting in a slightly imperfect bin is a minor inconvenience. A missing stitch marker mid-row is a genuine interruption.
Labelling That Actually Keeps Up With You
A label written once and never updated is often worse than no label at all, because it teaches you not to trust your own system. The most useful labels note weight, fibre content, and quantity remaining, since those are the three things you’re most likely to need to check before starting a new project. For a growing or serious stash, consider labelling by project potential too, a quick note like “enough for a jumper” or “scarf-only quantity” saves you unrolling a skein just to guess whether it’s enough.
Whatever labelling method you choose, pick one you’ll actually keep up with. A beautifully lettered label maker system that falls apart after a month does less for you than a plain sticky label and a pen, updated honestly every time your stash changes. Consistency matters more than polish here.
Work-in-Progress Storage That Travels With You
An active project has different needs from stashed yarn, because it needs to be portable, protected, and easy to pick up without untangling anything first.
A project bag with a flat base and secure closure is worth the investment if you knit on the go at all, since it keeps yarn, needles, and notions together and stops loose skeins from picking up fluff or catching on things in a bag. For projects you work on at home, a basket or bin beside your usual knitting spot means you’re not walking to a storage zone every time you sit down for ten minutes. If you’re managing several WIPs at once, giving each one its own labelled bag or pouch avoids the tangle of accidentally mixing yarn or losing track of which needles belong to which project, something that becomes a real problem once you’re juggling more than two or three at a time.
Small-Space and Shared-Space Solutions
Not everyone has a spare room to dedicate to craft storage, and a lot of knitters are working around a shared living room, a corner of a bedroom, or a flat with limited storage altogether.
Under-bed storage boxes are one of the most underused options for small-space knitters, since they keep a genuine amount of yarn out of sight without taking up any visible floor or shelf space. A single tall, narrow unit takes up far less floor space than a wide one while still holding a reasonable amount, and it tucks into corners that would otherwise go unused. For genuinely shared spaces, a storage ottoman or a lidded bench doubles as seating and storage at once, which matters when every piece of furniture needs to earn its place twice over.
The common thread across small-space solutions is thinking vertically and choosing pieces that do two jobs, rather than trying to shrink a system designed for a dedicated craft room down to fit.
It’s also worth being honest about how much stash a small space can realistically hold long-term. Rather than treating every square inch as potential storage, decide on a fixed footprint, one wardrobe shelf, one ottoman, one set of under-bed boxes, and let that boundary guide how much yarn you keep rather than the other way round. This isn’t about restricting your hobby, it’s about keeping a shared or compact space liveable, and most knitters find a defined limit actually makes their stash easier to enjoy rather than harder.
Display-Worthy vs Concealed: Choosing What Shows
Not all yarn needs to be hidden away, and deciding what’s on display versus what’s tucked into bins is as much a personal preference as a practical one.
Open shelving works well for a curated selection of yarn in colours you love looking at, and it can genuinely double as room decor when the colours are chosen with a bit of intention. It’s less practical for yarn you’re not actively using, though, since open storage exposes wool to dust and light over time, which matters if a skein might sit there for a year or more before it’s used. Concealed storage, bins, boxes, and closed cabinets, protects yarn better over the long term and suits anyone who’d rather their storage stayed out of sight until needed.
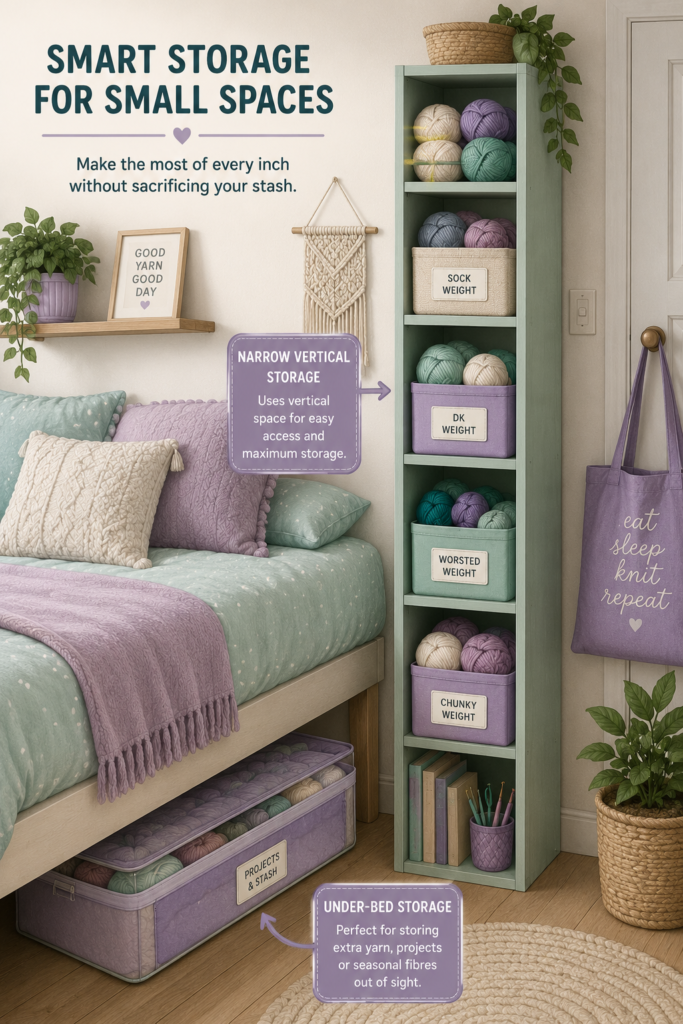
Most knitters end up landing somewhere between the two: a small display shelf for favourites and works-in-progress, with the bulk of the stash tucked away and protected. There’s no single correct answer here, only what suits your space and how much you want your storage to double as decor.
A few practical points can help you decide either way. Wool exposed to direct sunlight will fade over time, so if you do go with open shelving, position it away from a south-facing window rather than in the brightest spot in the room. Colour-blocking a display shelf, arranging skeins by hue rather than by weight or project, tends to look the most intentional if the goal is genuinely decorative, but it does mean your “at a glance” system for finding a specific yarn stops working, so this only suits yarn you’re not relying on to be quickly searchable.
If you’re not sure which camp you fall into, start with everything concealed for a month or two and notice which skeins you find yourself wishing you could see. That’s usually a much better guide than deciding upfront.
Building Your System From Here
Good yarn storage isn’t a single purchase. It’s a handful of decisions built around what you actually own and where you actually live, starting with a proper sort, choosing containers sized to your real stash rather than an aspirational one, and giving needles and notions the attention they usually don’t get. Whether you’re working with a starter collection in a single box or a serious stash that needs a dedicated zone, the right system is the one that matches your space, not the one that photographs best.
Start with the sort. The rest tends to follow once you can actually see what you’re working with.