

As an Amazon Associate I earn from qualifying purchases and sometimes recommend products from other sellers at no extra cost to you. For more details see my disclosure policy and privacy policy.
This post may contain affiliate links - I may make commission from any purchases.
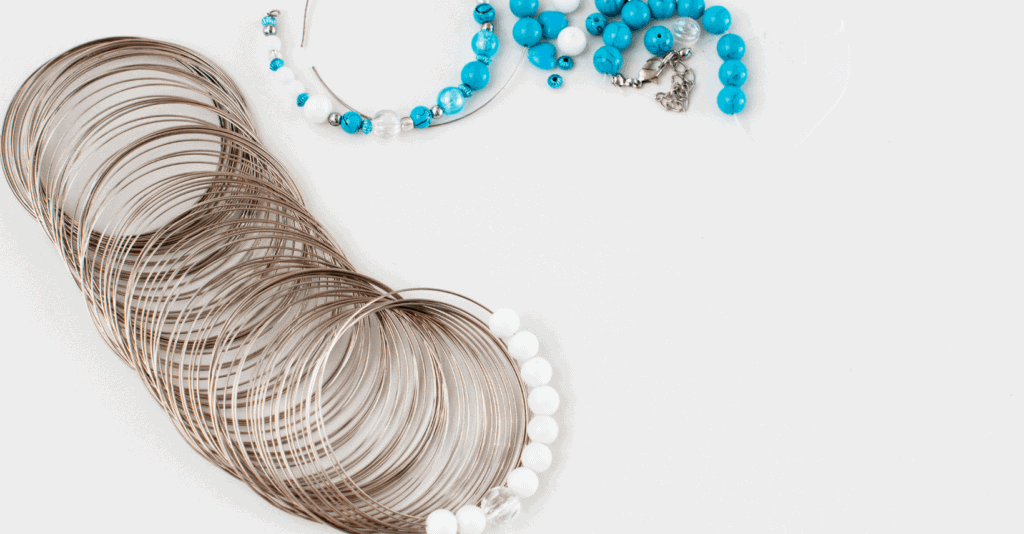
Memory wire bracelets are a popular choice for DIY jewellery because of the low cost and how easy they are to make. Memory wire is a flexible metal that has been shaped into thin coils, making it perfect for creating lightweight, durable pieces of jewellery!
Let’s look at what you need and how to make your own DIY memory wire bracelet for whatever outfit you want to pair it with.
Table of Contents
Memory Wire 101: Using Memory Wire in Jewellery Making
Memory wire is a thin, pliable metal that can be shaped into different styles of jewellery. it is a little different to other types of beading wire. It’s flexible and durable- perfect for bracelets and necklaces. Memory wire comes in various gauges at craft stores like Hobby Lobby or Michael’s Crafts, but the thicker the memory wire is, the more difficult it will be to work with.
Memory wire is often used in wrap style bracelets where more than one circle of wire is used to create a much longer bracelet. Another option is to wear multiple single loop bracelets together to create that ‘arm candy’ look.

Another style is to use a single piece of wire. The wire is wrapped around the wrist and then a clasp can be used to keep it in place. Or it can grip the wrist with rounded ends or balls if the size is right.
You can also get a little more technical! If you take 3-5 pieces of single loop wire and use special findings that keep them separate, you can make a multi-layer cuff bracelet. These work really well with things like Swarovski crystals for the ultimate sparkly look.

How to Use Memory Wire & Choosing the Right Size
The best memory wire to use for beginner jewellery making is 20 gauge.
Types of Memory Wire: There are three different types of memory wires- the traditional flat, which features a squared cut on one side and rounded ends with no finishing option; round, which has a small ball at each end that can be finished as desired (with chain if you want as well) and diamond, which has a diamond-cut on one side and rounded ends.
Diamond memory wire is the most popular choice for jewellery making because it’s durable- perfect for bracelets or necklaces that may need to withstand more wear and tear than other pieces of jewellery. It also features some beautiful finishes including hammered, brushed, polished, satin and more.
If you don’t want to use any of these types of memory wire, there are also other options like copper, sterling silver and gold.
Tips for Choosing the Right Memory Wire:
- Match your material type with the desired look- For example, if you’re using 14 gauge wire in a round shape or 20 gauge in diamond then think about a bright, polished finish
- Consider the style of jewellery you’re making and how much wear it will undergo- For example if your wire is going to be under more pressure in a bracelet then choose diamond memory wire. If you want fancy bows at the ends or are using heavier beads like glass bicone crystals then use copper. The material needs to be tough enough to support the beads
- Avoid memory wire that has a matte or satin finish; it will be more difficult to work with.
Design tips
One of the simplest ways to make a memory wire bracelet is just to grab a bag full of random beads and thread them. That way, you get a fun and funky looking bracelet that is random and unique.
Another idea is to have a central motif. This might be a larger bead or even a charm. If you want to mirror the pattern on either side of this, use a bead board to lay out the beads first so you know what goes where. Then simply start from one end, thread all of the beads and finish.

Step By Step Instructions
Do not use regular wire cutters for cutting memory wire as it will damage them. We recommend using heavy duty side cutters, made from tougher steel which is perfect to use on stronger wires. Use Devcon epoxy glue to secure end beads or half drilled beads on the ends of your wire for a secure finish!
1. Use heavy duty side cutters to cut at least three memory wire coils.
2. If using, glue to the inside of the end bead and secure onto the end of the memory wire.
3. Thread your chosen beads onto the memory wire, leaving some room on the end of the wire to allow the beads to move around slightly.
4. Glue another end bead onto the end of your wire.
If you are unsure how long you want the bracelet to be, you can curl or finish one end them just keep adding the beads. If the coil of memory wire is really long, you might want to cut it as otherwise it will take ages for all the beads to thread along it.
For designs with a central area that you aren’t sure about the length, you can use a bead stopper on the end you aren’t threading onto. So start in the middle, add beads to either side, using a stopper on the end you aren’t threading to.
Ways To Finish Your Memory Wire Bracelet
Silver Plated End Beads For Memory Wire
Some of the most popular ways to finish your memory wire bracelet design professionally is by using end beads. Silver plated, these are purposefully sold to use with memory wire and all you need to do is add Devcon Epoxy Glue in order secure them at the ends for a neat and tidy finish that will stand up beautifully time after time.
Alternatively, if you’re looking for something more fun or creative than just silver coloured one can drill half way through their bead before gluing it onto the end as well.
Simple loops
My favourite way to finish memory wire bracelets is to simply loop the end of the wire once or even a couple of times. This creates a loop at either end that is comfortable against the skin. Use round nose pliers to make it easier to get the round shape. Plus the rounded shape of the coils of memory wire helps with this!
It is also a great way to add some charms or beads to one or both ends of the bracelet. Use a jump ring to add a charm straight to the loop or thread some beads onto a head pin, create a loop at the end and use a jump ring to attach the two.
Memory wire bracelet FAQs
What is Memory Wire?
It’s a hard, rigid, pre-coiled wire which holds its shape – unlike regular metal jewellery wire , memory wire cannot be manipulated to change its shape.
How do I add a loop to my memory wire?
Instead of using end beads you can use round nose pliers to form a loop at each end of the memory wire to secure in place.
What beads are used for this project?
Choose Your Favourite Beads In this project, we have used our beautiful 0.8mm amazonite beads and 3mm plain round silver plated metal beads but you can choose any of your favourite beads as long as the bead hole will fit through the memory wire.
What is the best wire for making memory jewellery?
This 0.6mm plated stainless steel wire is from Beadsmith and is so easy to use to create lovely designs.
What is Devcon epoxy glue?
This is our most recommended glue for all types of jewellery making, it’s fast-drying, high strength and creates high quality bonds on gemstones, metal, glass, ceramic and more.
Making your own memory wire bracelet
Making a memory wire bracelet is a great project even if you haven’t made jewellery before. There are plenty of tutorials on YouTube and other sites that can show you how to make one, but the best part about this DIY craft is that it’s easy to do without lots of complex equipment or planning ahead!
You can create something fun and random with beads as well so there really isn’t any need for advanced preparation either. In fact, all you need are some tools-memory wire (available in most craft stores), pliers, clamps or binder clips, scissors and beads.
What kind of bracelet could you make?


